Big Walk Kettle Puzzle — The Red Kettle & Switches Guide
Last verified: August 19, 2026 · Written for both the switch player and the button player.
The Big Walk kettle puzzle — the room players call Red Kettle & Switches (or "Red Kettle Relay") — is the fifth of the seven co-op rooms inside the black sphere. It is also the room where voice chat quietly stops being reliable, which is the whole point: the room is built around a physical signal, a single red kettle, and the groups that treat the kettle as their only language solve it faster than the ones still shouting. This guide covers the room's layout, the glowing-button pattern, how to use the kettle as a marker, and the second, nastier kettle room one floor up that a lot of players find first.
Location
The kettle room sits inside the black sphere — the huge orb at the end of the Black Tower's gate route. Getting in takes the Black Key: insert it into the gate (player reports disagree on the exact spot — the north-facing front door of the Black Tower and a huge green gate on the far western side of the island, where voice chat distorts, are both described), walk through, and head straight for the sphere. Inside, the room is the fifth of the seven co-op rooms, reached after the Race Track (the simultaneous-switch sprint) and before the Hidden Symbols viewfinder room. Like the rest of the sphere, this room muffles or blocks voice — treat it as voice-off from the start and you'll save yourself an hour.
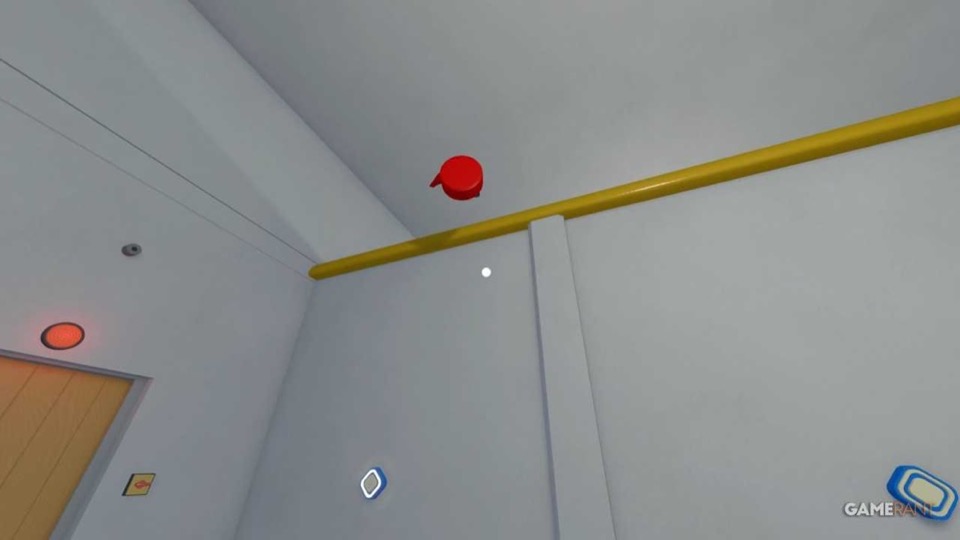
Red Kettle & Switches — one player works the wall switches, the other reads the glowing buttons, and the red kettle is the only signal that crosses the wall.
How It Works
The room is split in two by a wall. On one side, the switch player stands at a row of wall switches. On the other, the button player gets a row of buttons that light up in a pattern — a set of glowing positions that tells the team which switch to activate. The catch is the same one that defines the whole sphere: you cannot reliably hear your partner, and the room gives you almost nothing to read through the wall.
That's what the red kettle is for. The room's built-in signal works like this: the glowing buttons are the code, and the kettle is a marker you can move. If a position in the code is lit, the kettle needs to be at the matching switch; if a position is blank, that switch stays untouched. Groups describe it as "using the kettle as a dot" — a lit button is a dot, and the kettle physically marks where that dot lives on the other side of the wall.
The Kettle Pattern
Read the button row like a short code, left to right, and translate it into kettle positions:
- Look at the glow. The buttons light up in a fixed pattern — some lit, some dark. That pattern is the entire puzzle.
- Mark each lit position with the kettle. Move the red kettle to the switch that corresponds to the first lit button, then the second, and so on. A position with no kettle is a blank — leave it alone.
- Press in order. The switch player follows the marked switches; the button player confirms each step by watching the row. In the playthroughs that crack this room fast, the call is literally "kettle, no kettle, kettle, no kettle" — a running translation of the pattern as it's being marked.
- Confirm the tail. Patterns often end on a distinct mark (a three-dot finish, for example) — when the last lit button is marked and pressed, the room unlocks with the usual confetti.
Some groups skip the marking entirely and just toss the kettle over the wall toward whichever switch needs pressing at that moment. That works too, and it is the natural fallback when you only have two players and no spare hands — but it is slower, and the kettle can land in the middle or roll back, which resets your rhythm. Marking positions with the kettle is the reliable route.
Team Roles
- Switch player (left side). Works the wall switches. Does not need to see the button row at all — only the kettle's position.
- Button player (right side). Reads the glowing pattern and moves the kettle. This is the brain of the operation in two-player runs.
- Kettle tosser (three or more players). With spare players, one person can dedicate themselves purely to moving the kettle across the wall while the button player reads ahead — this is the fastest setup.
- Window relay (four players). If your group found a line of sight through the window, a fourth player can call the pattern in person while the others work the mechanics.
The 100% playthroughs of the game describe this room as one of the hardest in the whole sphere — the moment the group stops talking and starts treating the kettle as the language, the room usually falls within a few attempts.
The Second Kettle Room
One floor up, the sphere hits you with a second, meaner kettle puzzle — and because it is a different layout, groups often walk in expecting the same trick and walk out frustrated. Here each player has their own room, and the goal is much more physical: kick or throw the red kettle in a straight line toward the lit button so the other player knows exactly which one to press. "Light equals kettle" is the whole rule — a button lights up, and the kettle has to reach it.
The failures are almost always the same three:
- The kettle lands mid-floor. A short throw that dies before the button leaves everyone guessing which position was meant.
- The kettle rolls back into your own zone. You throw it, it bounces off the wall and comes home — now the other player has no signal at all.
- Nobody calls the live button. With voice unreliable, the lit button is easy to lose track of while you're fishing the kettle back. Assign one person to watch the row and announce every light change.
Take the throws one at a time: wait for a light, aim the kettle, confirm it stopped where you wanted, then have the button pressed. Rushing the kettle is how the "easy" room becomes the one that eats the group.
Common Mistakes
- Relying on voice. This room blocks or muffs voice chat on purpose. Every minute spent shouting across the wall is a minute the pattern could have been marked.
- Treating the kettle as a throwaway. It is your only marker. If you fling it and lose track of it, you are blind until it comes back.
- Forgetting spent positions. The pattern moves on as you press; a switch you already hit can light up again in a later round. Re-read the row every time.
- Letting the "dot" language break down. Once you say "kettle = lit, no kettle = blank", say nothing else. Changing the code mid-room is how groups solve the same pattern three times.
- Rushing the second room. The kick-and-aim room punishes haste harder than the marking room — a misplaced kettle is a full reset of the attempt.
Reward
Clearing the kettle room pushes you through the sphere's gauntlet — it is a mandatory step on the way to the orb core at the top, where the final button sequence deactivates the sphere and unlocks the first ending ("Big Goodbye"). The kettle room is also one of the rooms you must complete for the sphere's full clear on the road to the true ending, which additionally asks for all seven purple-gourd puzzles and every skipped puzzle on the island. Want the full sphere layout and the other six rooms? See the puzzle hub's black sphere section; stuck in the room right after this one? The camera / viewfinder puzzle guide covers it.